How to setup your kite shop: a step by step guide
Setting up your Kite.Shop is simple and straightforward. Follow this step-by-step guide to quickly customize your shop and start selling with ease.
Step-by-Step Guide
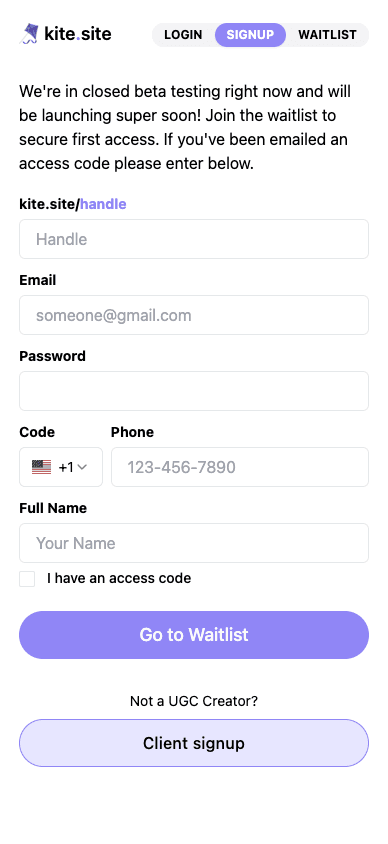
Log into Your Creators Profile
Start by choosing your kite.site handle
Tip: many creators choose to make their handle the same as their social media handles for consistency.
Add your email address, phone number, full name and set your password.
Add your profile picture

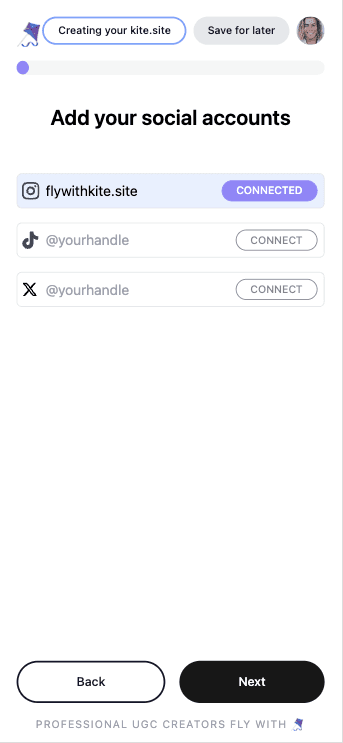
Add Your Social Accounts
Next, type in your social account handles for Instagram, TikTok and X (Twitter).
Make sure to press “Connect”
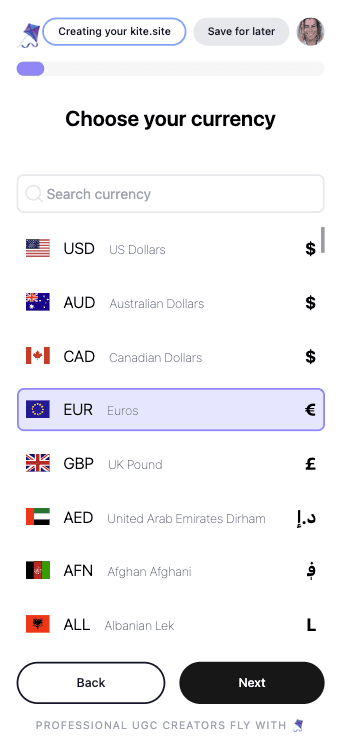
Choose Your Currency
This is the currency you will charge your customers in
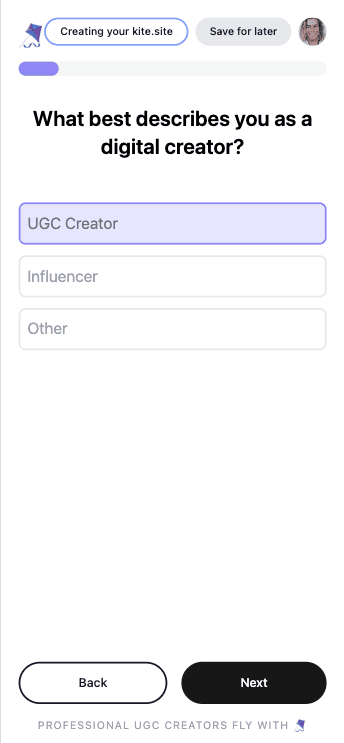
Click on the Digital Creator Type that Best Describes You
Are you primarily a UGC creator, an influencer, or another type of digital creator? If you do both, just choose the option that best describes you.
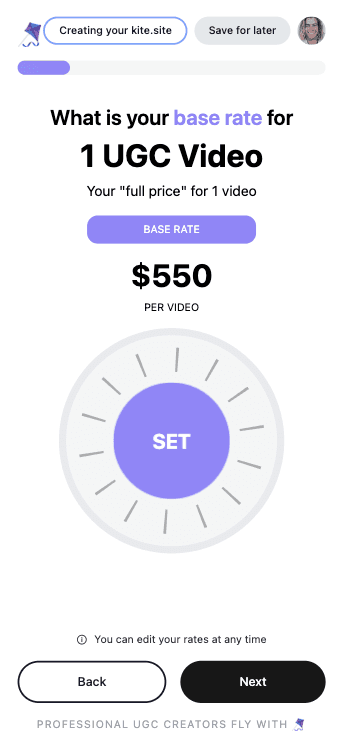
Set Your Base Rate for 1 UGC Video
What is a base rate? Your full price for a video before any discounting or add ons.
Note: to set your base rate, hold down your finger anywhere on the circle spinner and turn clockwise. Release your finger once your desired base rate is set.
Tip: Your UGC base rate should reflect your experience, niche and quality of your work. For a beginner, base rates typically start at $100-$250 and increasing significantly depending on your expertise and demand. Check out our pricing calculator here if you’d like a hand with this.
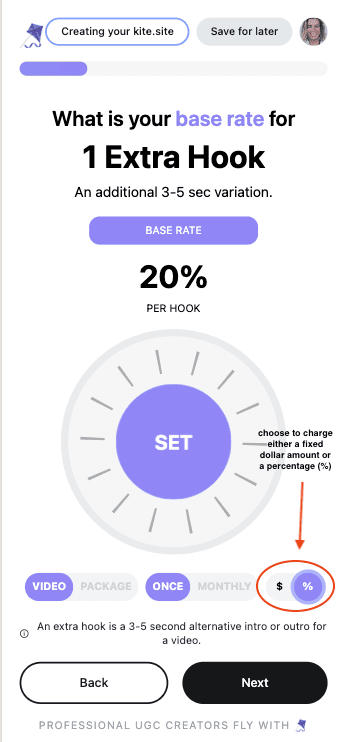
Now Set Your Base Rate for Extra Hooks
What are Hooks: Typically refers to the first 15 seconds of a video designed to grab the viewer's attention. Clients often request additional hooks to generate cost-effective extra content as an alternative to ordering multiple full UGC videos.
Note: You can choose to set your base rate for additional hooks as a fixed currency amount or as a percentage of the base rate. You can toggle between the two options - as highlighted in the screenshot below.
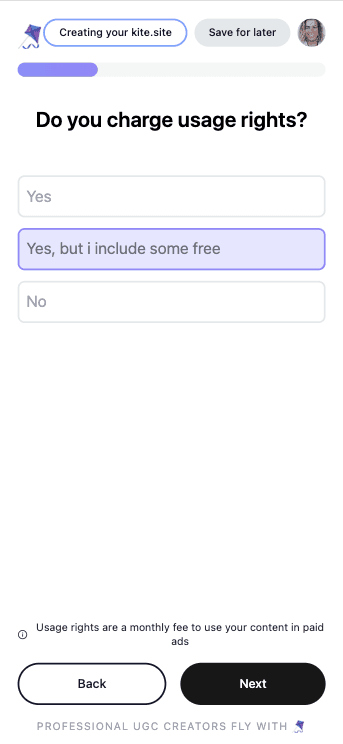
Let us Know If You Charge Usage Rights
If you’re a creator that includes usage rights, select ‘No’.
Note: Selecting no means you’re including unlimited usage of the content for perpetuity.
If you sometimes include usage rights free, but not always, select ‘Yes, but I include some free’
If you always charge usage rights, select ‘Yes’
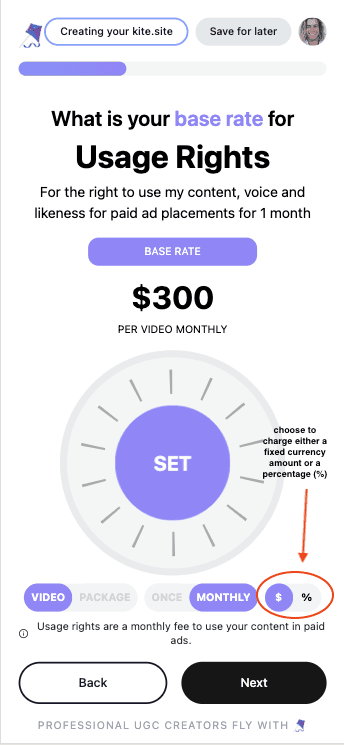
If you select ‘Yes’ you'll need to set your base rate.
Usage Rights: define for how long your content can be used
Note: You can choose to set your base rate for additional hooks as a fixed currency amount or as a percentage of the base rate. You can toggle between the two options - as highlighted in the screenshot below.
If you select ‘Yes, but I include some free’ you’ll need to select the number of months that you want to include for free.

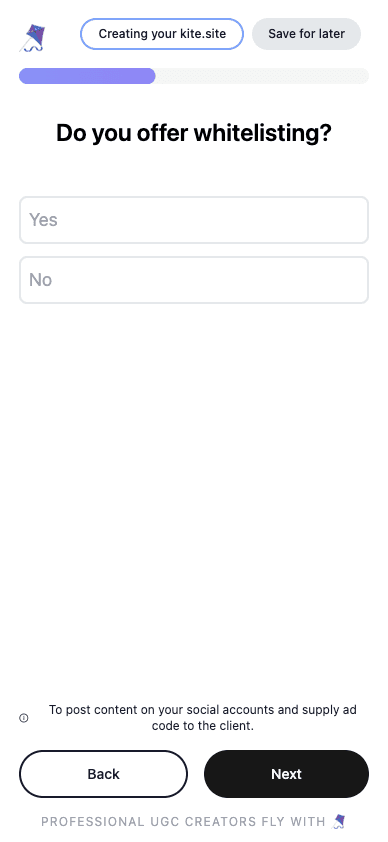
Next, Choose If You'd Like to Offer Whitelisting or Not
What is Whitelisting? Granting a brand partner permission to use their social media profiles to share sponsored content.
Note: Whitelisting is a strong strategy that helps brands seem more authentic. It's becoming more popular because it often gives brands a better return on their ad spend compared to advertising without using the creator's account. It's also a great way for creators to earn extra money.
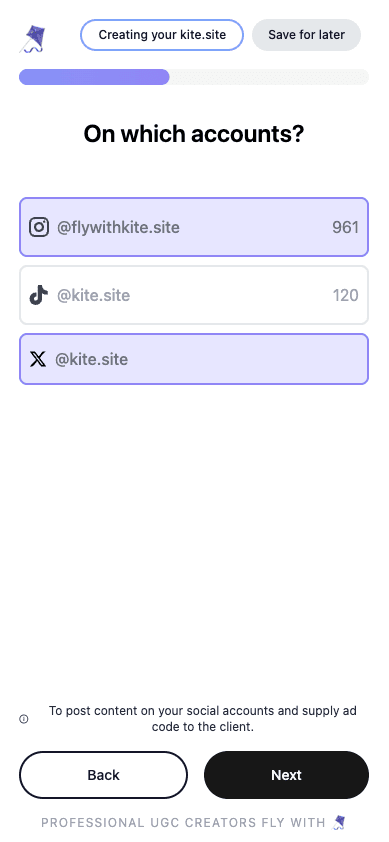
If you selected ‘Yes’ you’ll need to choose the social media accounts you’re open to whitelisting with. (Here we have selected our Instagram and X account)
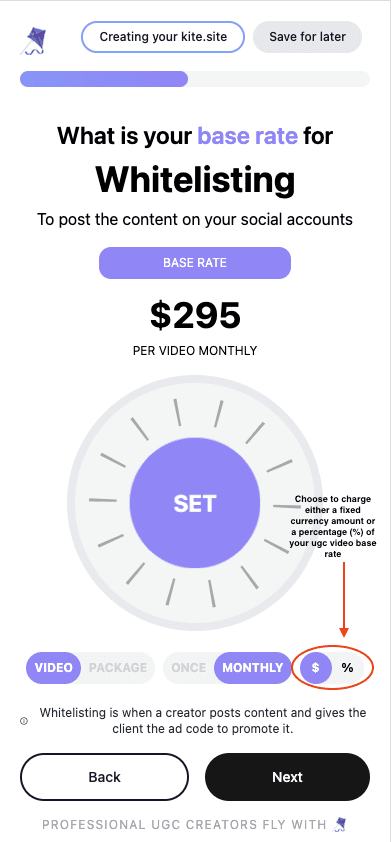
If you’ve selected ‘Yes’ to whitelisting, you'll also need to set your monthly base rate.
Note: You can choose to set your base rate for whitelisting as a fixed currency amount or as a percentage of the base rate. You can toggle between the two options - as highlighted in the screenshot below.
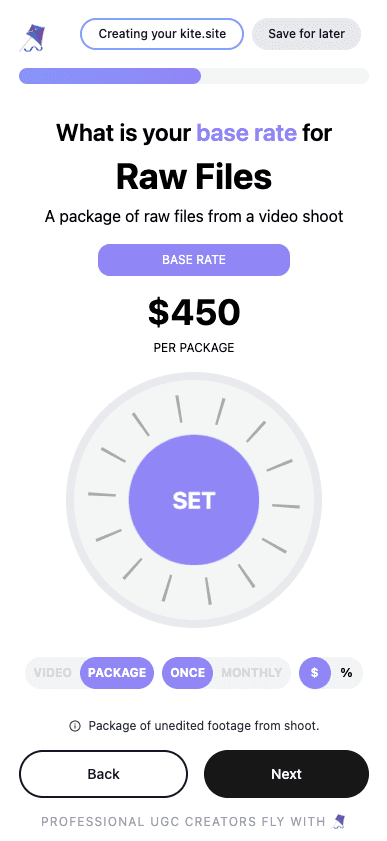
Now Let's Set Your Base Rate for Raw Files
This is the amount you charge for sharing your unedited clips with the client, allowing them to create additional videos or use the content however they choose.
Raw files: The unedited, original video clips captured during the filming of a UGC video.
Add in any extras you want to offer brands
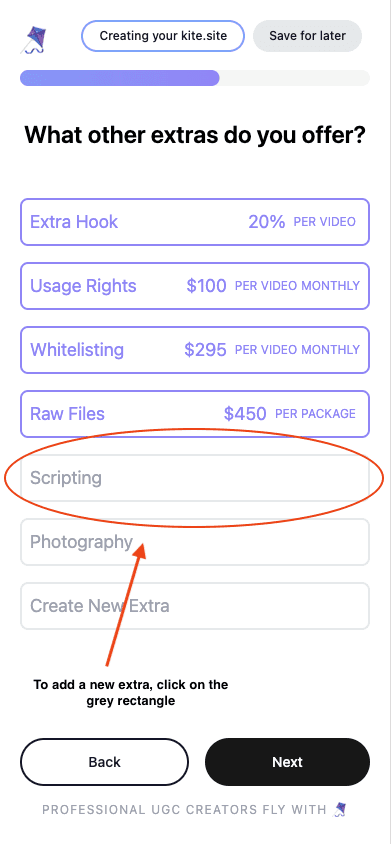
Note: make sure to name the extra and add a short description.
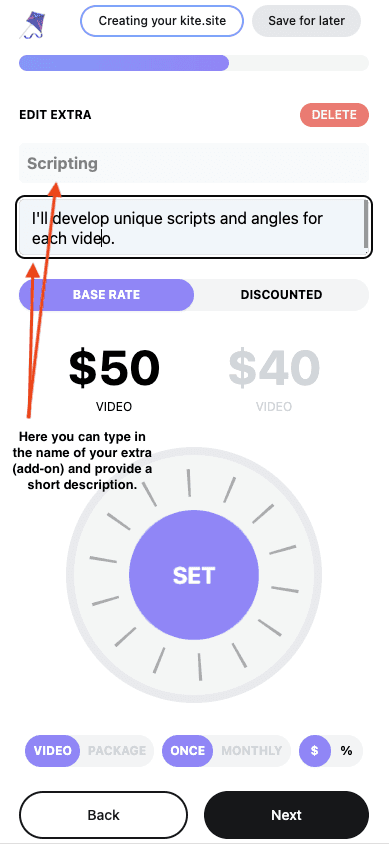
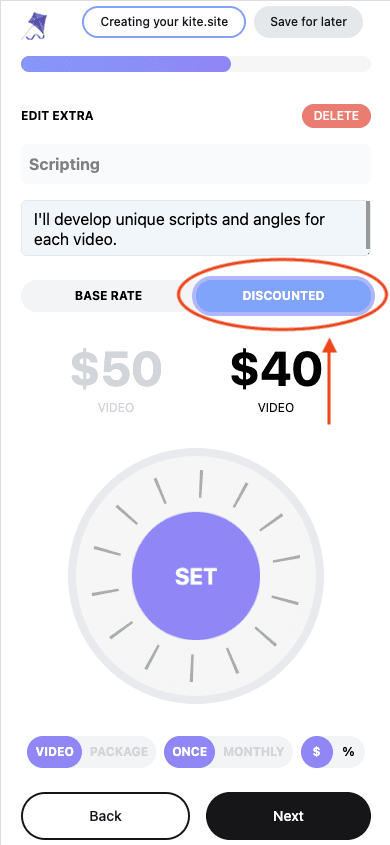
You also need to set your ‘discounted rate’ for you extra.
Note: adding a discounted rate can incentivise brands to place larger orders and even opt for retainer packages through your Kite Shop.
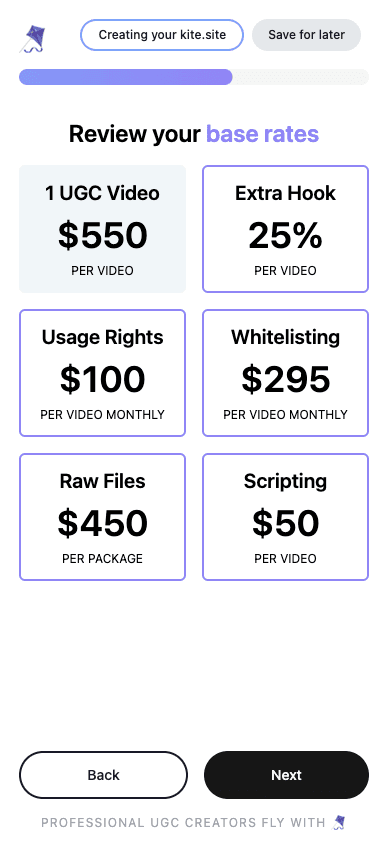
Review Your Base Rates
Note: make sure you’re happy with all of them. You can edit them by clicking on any of the tiles.
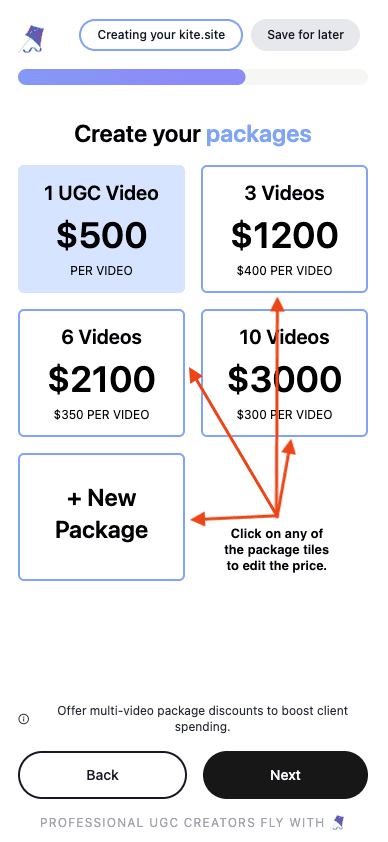
Now It's Time to Create Your Packages
Note: Make sure to offer a good discount per video. This will help you to increase your Average Order Value (AOV).
Set Your Discounts for Extras
Note: Make sure to offer a good discount per video. This will help you to increase your Average Order Value (AOV).
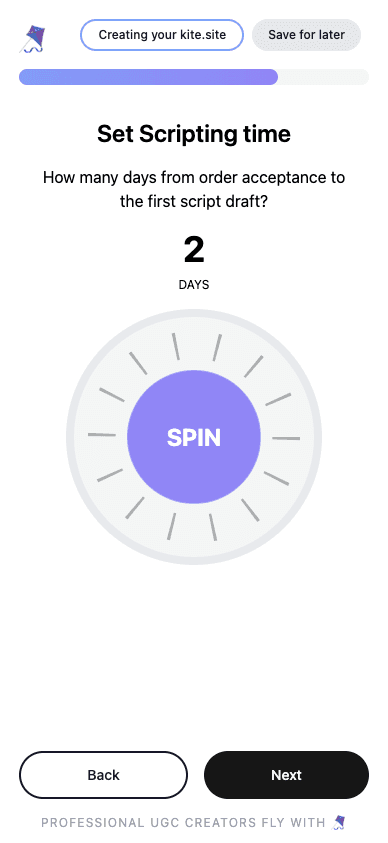
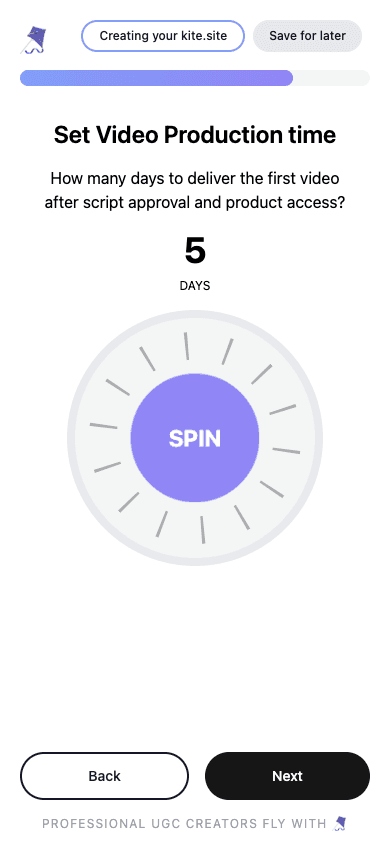
Set Your Scripting Turnaround Time and Your Video Production Turnaround Time.
Tip: It's wise to be conservative with turnaround times—it's always better to exceed expectations than to overpromise and underdeliver.
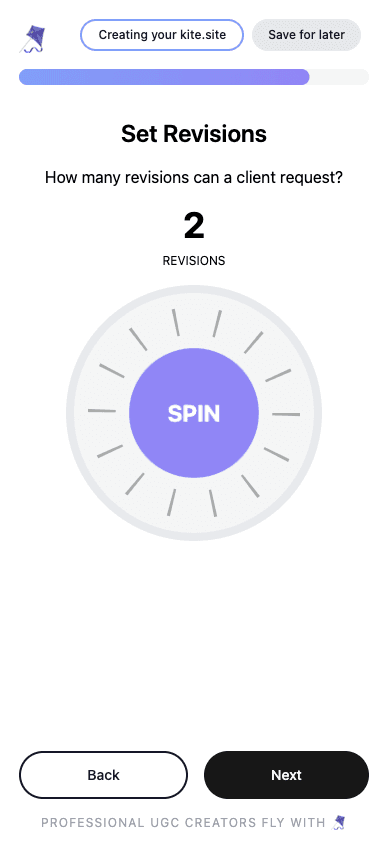
Set How Many Revisions You Offer Clients
Note: we usually recommend no more than three.
Almost There!
Now let brands know how many paid UGC jobs you've completed for brands.

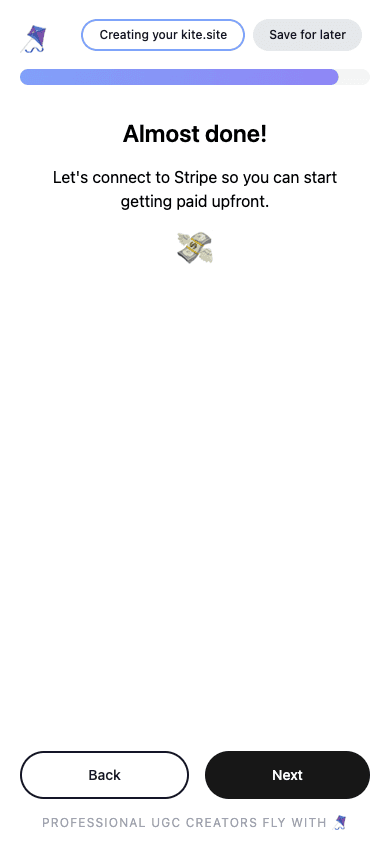
Now We're On The Home Stretch
connect your Stripe account so you can get paid.
Note: you’ll be redirected to Stripe where you’ll need to add your email address and connect your bank account in order to receive payments directly to you.
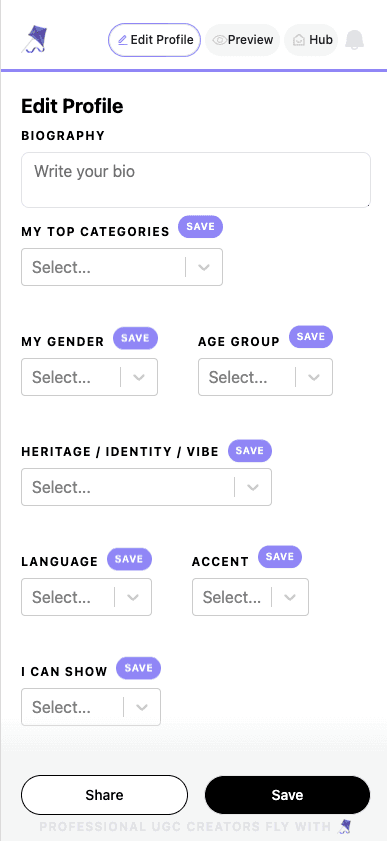
Finally 🎉🪁
Add a few more details to help brands find you and let them know what you can offer.

Woohoo! You’re all set! Now make sure to share you kite shop link in your bio on your social media accounts and start selling!